IoT ProjectsParticle Photon
IoT Based Smart and Secure Lock V1.0
In this project we’ve built IoT based smart and secure lock which have 3 layers of access. RFID + PIN/password + OTP(one time password).
Things used in this project
Hardware
- Particle Photon Development Board
- Itead Nextion NX4832T035 – 3.5″ HMI TFT LCD Touch Display Module
- MFRC522 RFID Reader Module
- MB102 Breadboard Power Supply module
- Solenoid Lock -12V
- Two Channel Relay Board 5V
- Batteries – 7.4V LiPo, 11.1V LiPo and Power Bank.
Software apps and online services
- Particle Build Web IDE
- Microsoft VS Code
- Particle Workbench
- Particle Cloud Console
Overview
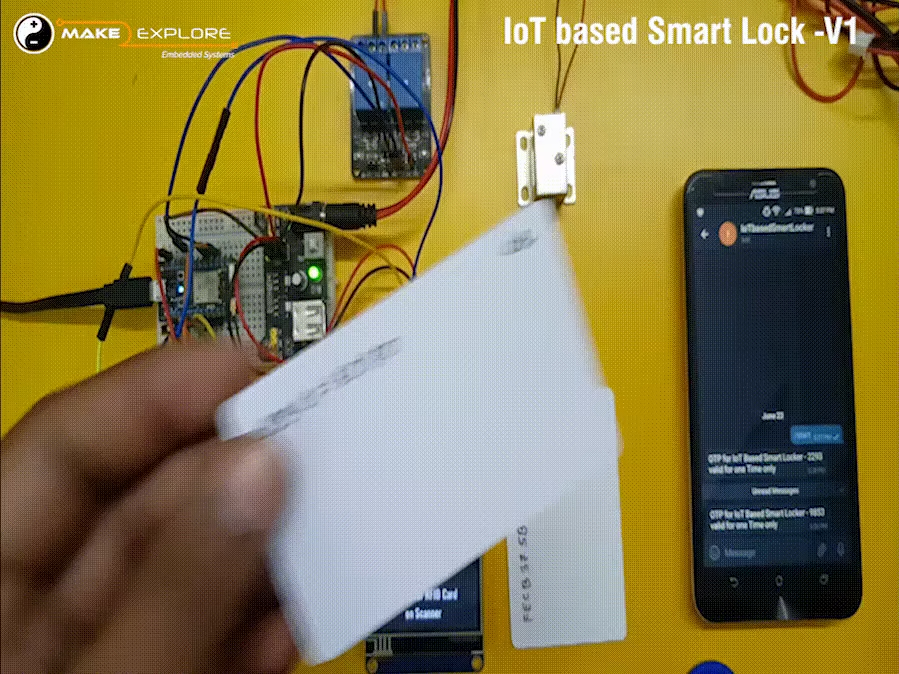
In this project we’ve built IoT based smart door lock which have 3 layers of access. RFID + PIN + OTP. Means if user want to unlock this lock he/she has to use valid authorized RFID card, then need to enter correct pin/password and finally has to enter unique one time password sent on his/her Telegram App.
- We’ve also implemented Data logging. Valid Entry through door will be recorded in Google Sheet. For that we have used Particle Cloud webhook integration. Using this data log we can monitor who entered lock and when.
- Particle Cloud webhook integration is also used to generate OTP using Telegram Bot.
- This is IoT based project uses Particle photon Development Board. hence you can update its firmware from anywhere using particle cloud console.
- Nextion Touchscreen HMI Display is used for interacting with this door lock.
We’ve covered this project in 5 parts as following, Each part is explained in separate video
Project Details
Part – I : Introduction
- Overview
- Tools and technologies Used
- Functional Block Diagram
Part – II : Software Setup
- Installing VScode IDE, Particle Workbench & CLI, Libraries
- How to Program and Flash the code into Particle Photon, locally and Remotely
- Brief Introduction about Nextion HMI Displays, Nextion IDE, Download and install
- How to getting started with Nextion Display
Part – III: Hardware Setups and Interfacings
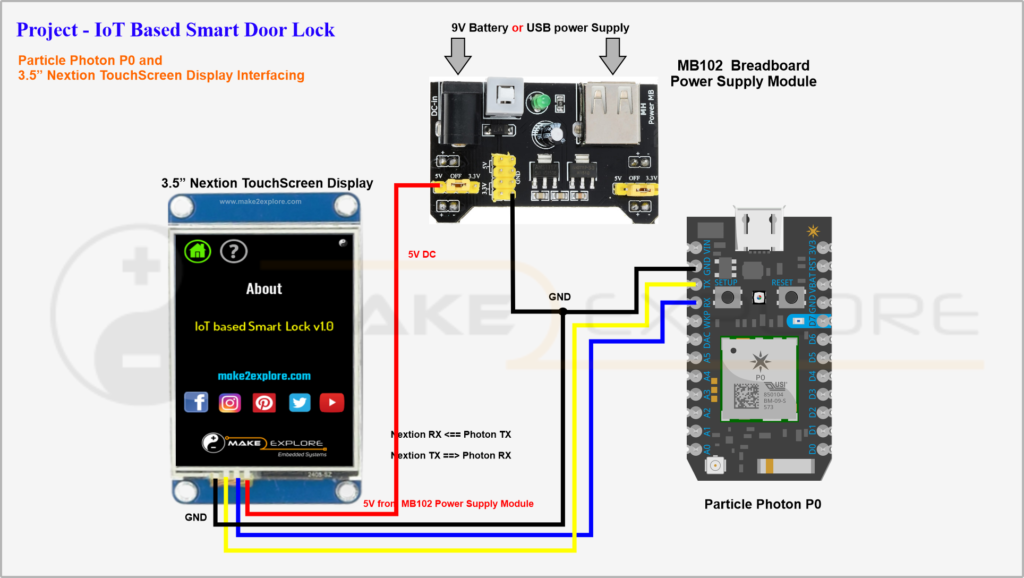
- Particle Photon and Nextion Display Interfacing
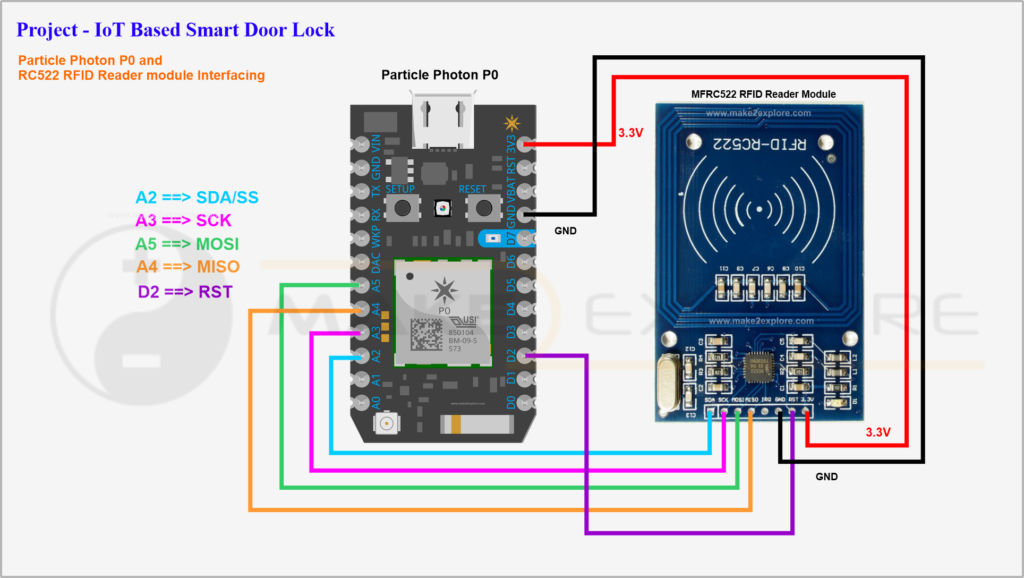
- Particle Photon and RC522 RFID Reader Interfacing
Part – IV : Cloud configurations – Creating Webhooks
- What are Webhooks ?
- How Webhooks Works ?
- Creating Webhook for OTP Generation
- Creating Webhook for Google Sheet Entry
Part – V : Demonstration
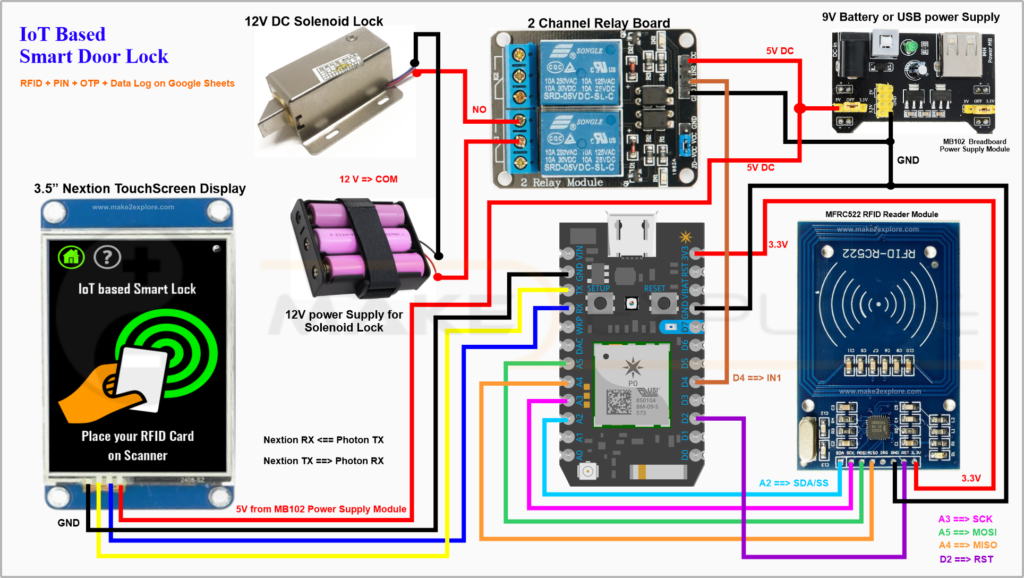
- Main Schematics
- Code of the project
- Demo of Project
Circuit Diagrams of the Project